Cardano Staking Guide
Post Date: 2021-11-23 16:00:00 +0000If you are an ADA holder, then staking is a great way to earn passive income. What makes Cardano different from some other crypto is that you never lock up your ADA, you never lose custody of it, and the rewards are compounding. You can unstake, stake, and transfer whenever you want. (If you do unstake though, you may miss rewards from the pool that you were staked to.) If you want to see how much you could earn, check out the Cardano Staking Calculator.
There are two big Cardano wallets, the Daedalus wallet and the Yoroi wallet. The main difference between the two is that Yoroi is a lightweight wallet that connects to a cloud server that hosts the Cardano Ledger. Daedalus needs to generate the Ledger locally. If you are familiar with Metamask or Phantom, you will probably be more comfortable with Yoroi. For this guide, we will walk through staking with Yoroi. If you want more information before choosing your wallet, check out the Yoroi FAQ and the Daedalus FAQ.
Installing Yoroi
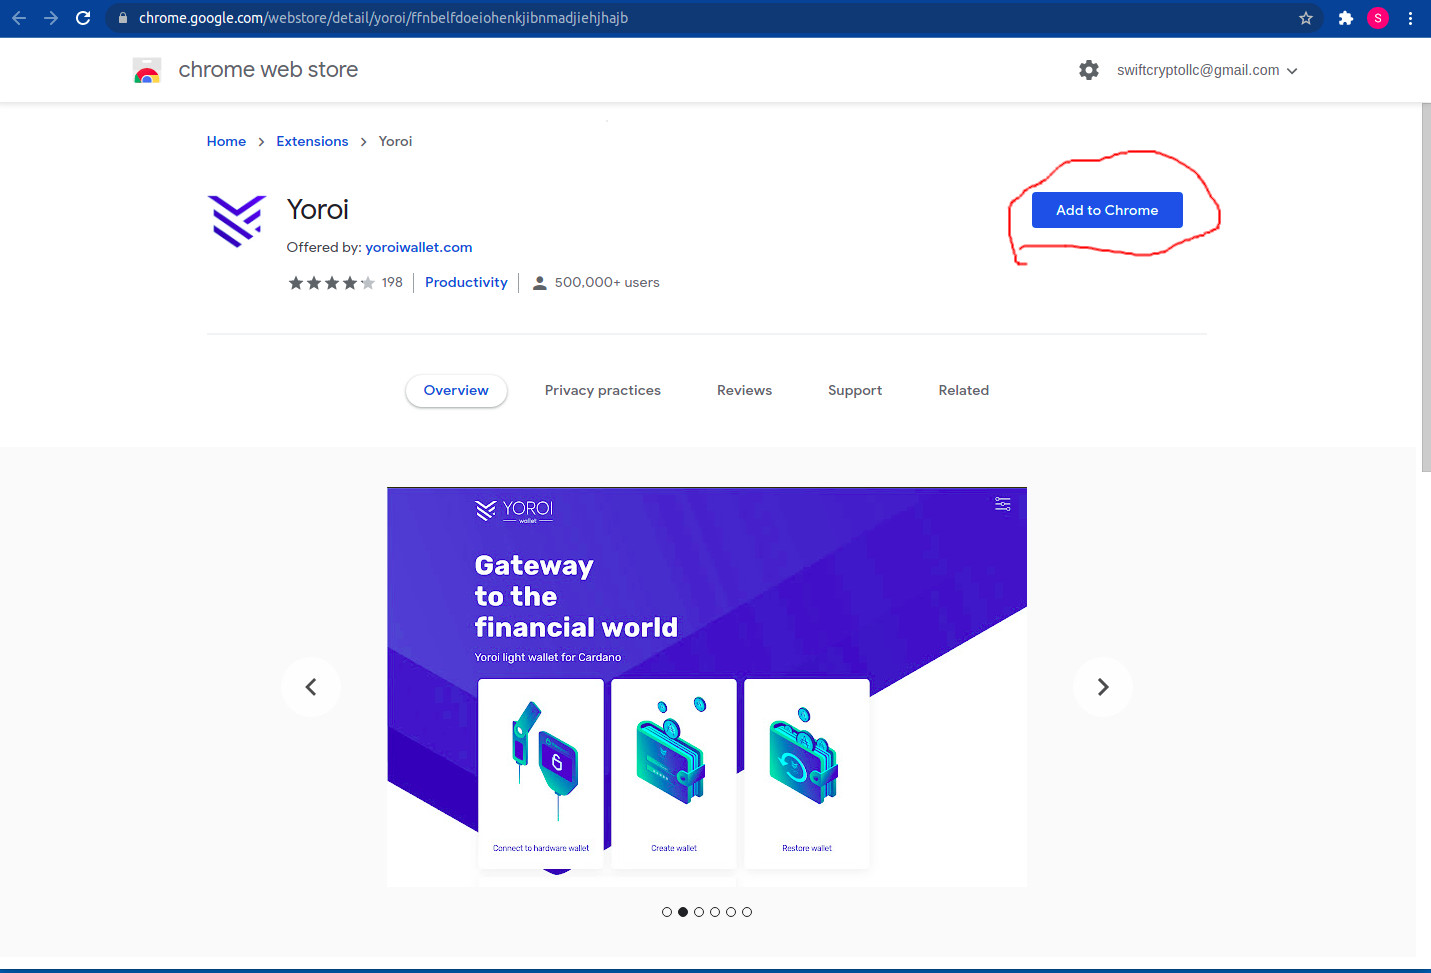
The first step is to install the Yoroi wallet extension to your browser. They have support for Firefox, Chrome (should work in Brave too), Edge, Android, and iOS. Installing it on Chrome will take you to the Chrome Web Store. Click the “Add to Chrome” button on the top right. You might get a warning message, just click through to add the extension.
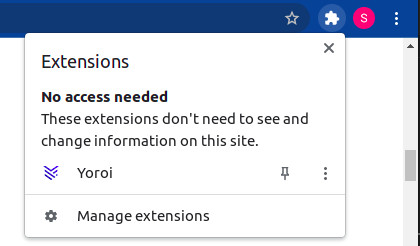
Yoroi will now appear in your Extensions icon in the browser. You can click the Pin icon next to Yoroi is pin it to your browser bar for easier access.
Click on Yoroi to begin setup. You’ll go through a basic setup of selecting your language and accepting the Terms of Use/Service Agreement. You will be asked if you want to enable Cardano Payments. If you select ‘No’, you can always enable it later.
Creating/Restoring a Wallet
The next step will be to create or import an existing wallet. It’s highly recommended to have a hardware wallet. Two of the leading hardware wallets are the Ledger Nano X and the Trezor. If you have a hardware wallet, click on “Connect to hardware wallet”, otherwise select “Create wallet” for a new wallet, or “Restore wallet” to import an existing software wallet.
Note that Trezor Model T supports ADA but the Trezor One apparently does not, see here.
Ledger has a fantastic guide that walks you through connecting your Ledger to Yori. Instead of repeating it all, you can read through it here
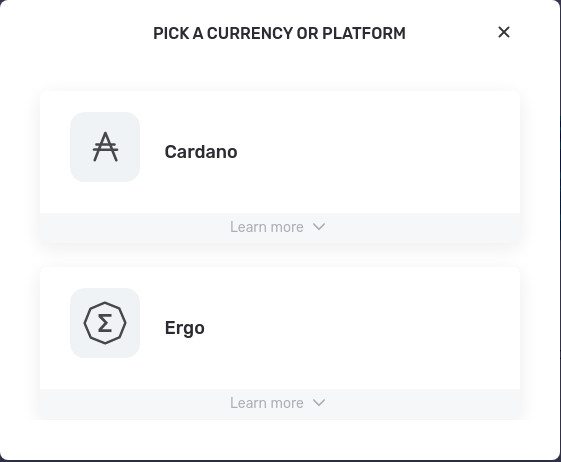
If you are creating a software wallet, click “Create wallet” and then select “Cardano” as the currency/platform.
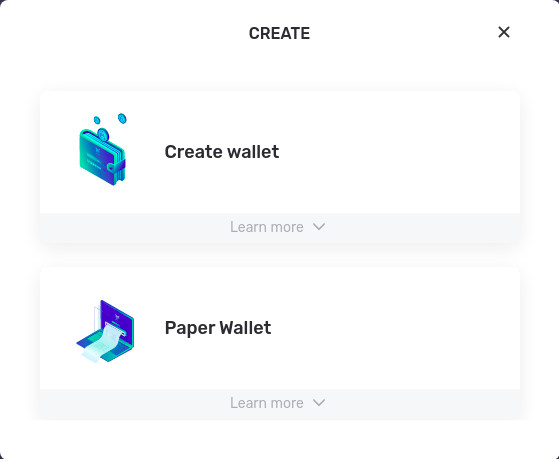
Choose “Create wallet” for the wallet selection.
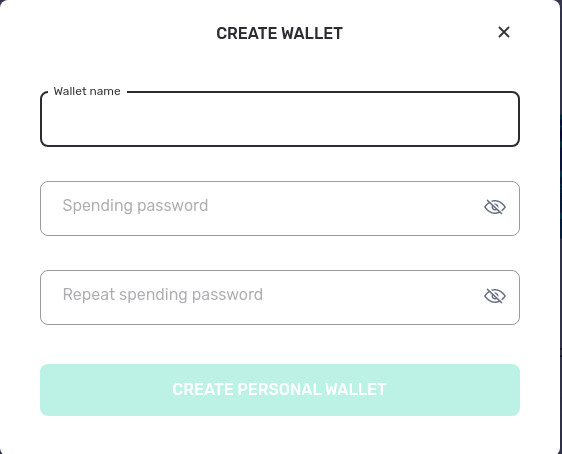
You’ll then be asked for a wallet name and a spending password. Don’t lose your spending password!
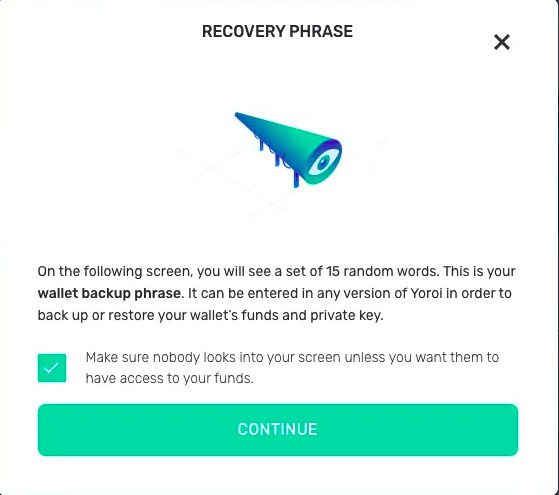
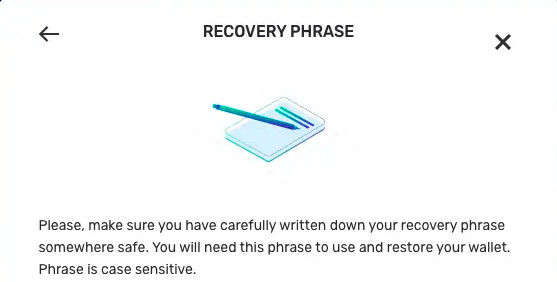
The next screen set will walk you through your recovery words. Yoroi recovery words consist of 15 case-sensitive words that can be used to restore your wallet. DO NOT store the recovery words online or on your internet connected device. Anyone with access to your recovery words can gain access to your wallet and drain all of your funds from that wallet. I recommend writing it down on paper and storing that in a secure location. You could also save it to a thumb drive and store your thumb drive in a secure location (a fire-proof or resistent safe is a fantastic storage option).
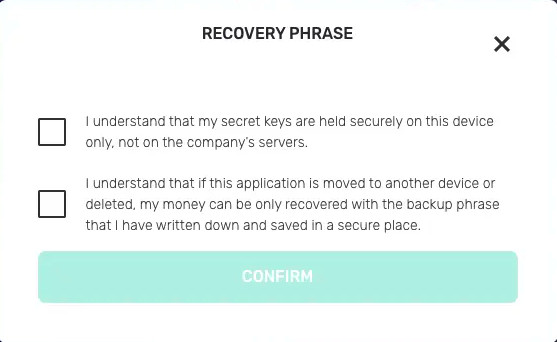
After securing your recovery words, click through the confirmation page.
Your wallet is now ready to use!
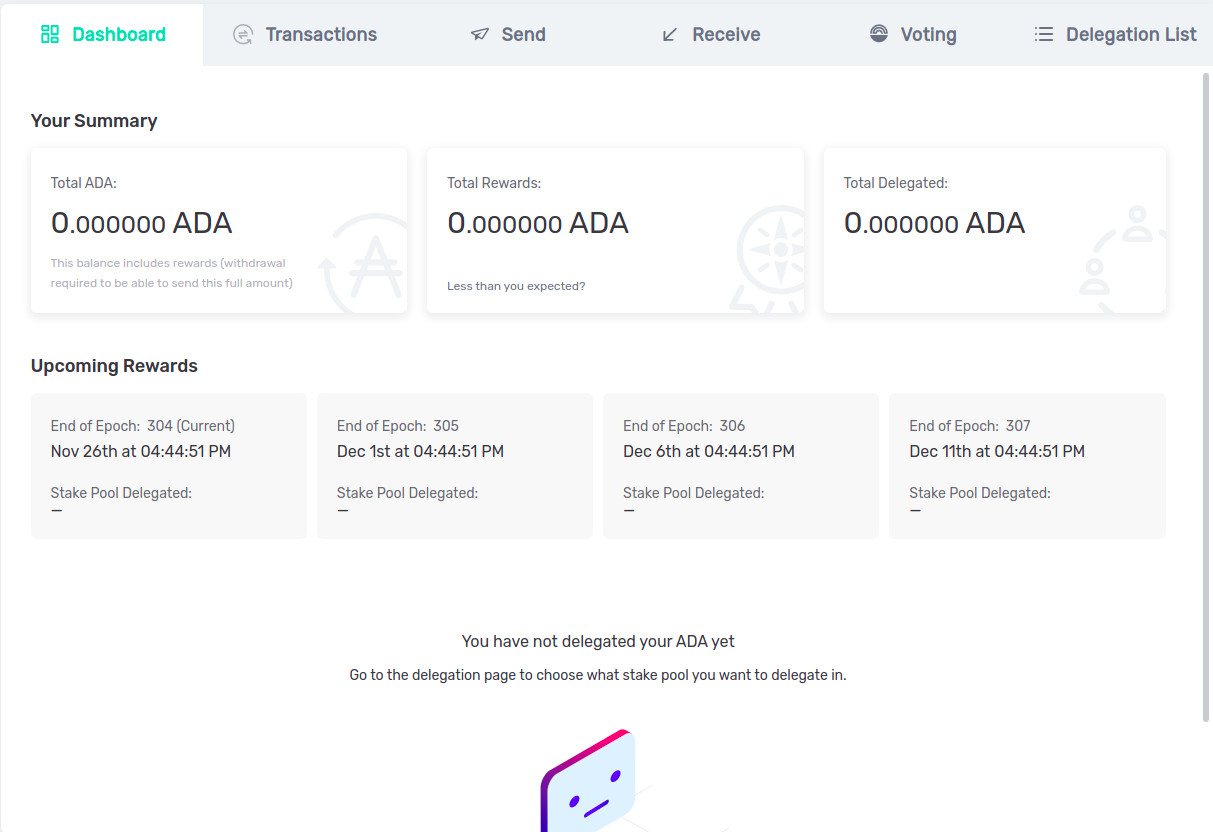
Yoroi Dashboard
On the Yoroi Dashboard, you can see your balance, reward balance, and your total delegation. Right now, Cardano allows delegation to only one pool per wallet. You can’t split your delegation to multiple pools from a single wallet. Your rewards will automatically be added to your delegation without you having to claim the rewards. You will pay a transaction fee to claim your rewards, so unless you are moving your ADA, it’s ok to leave them unclaimed as you still earn on your unclaimed rewards.
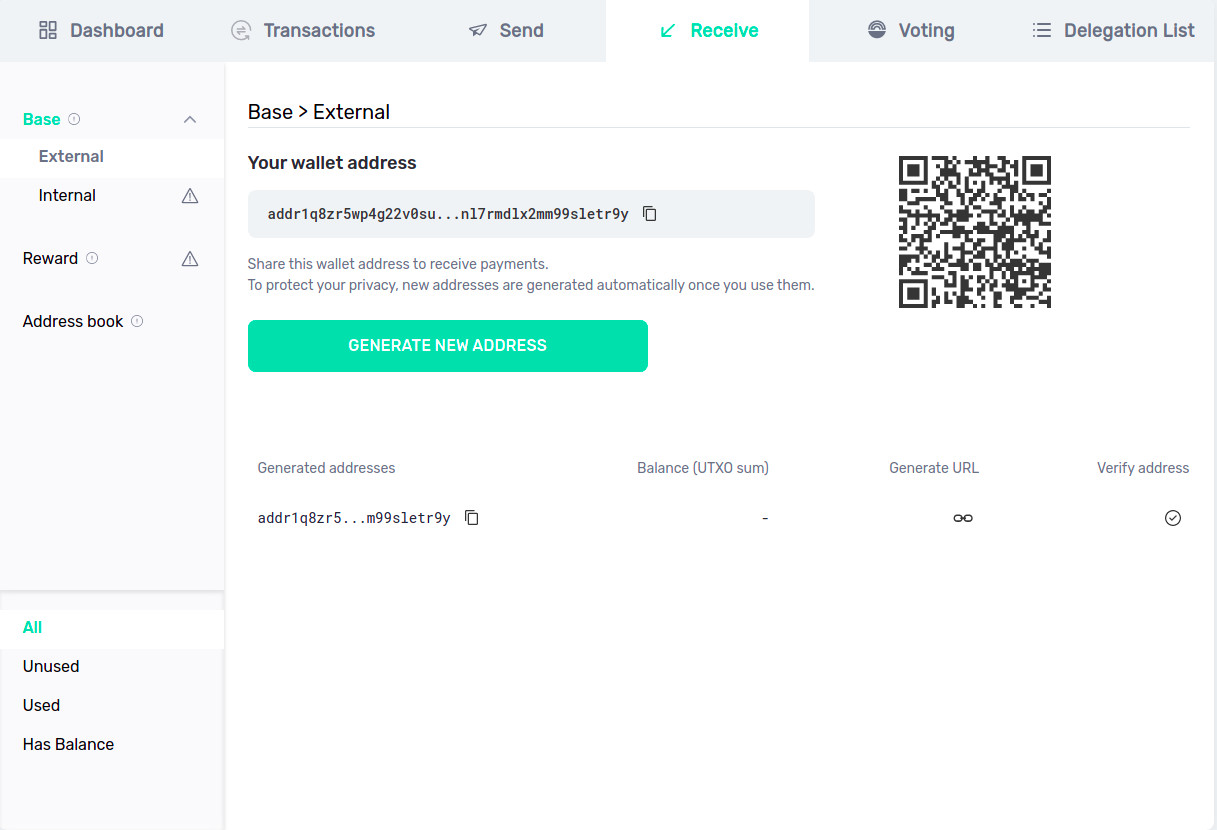
Transfering Funds to Yoroi
Click on the “Receive” tab from the Yoroi Dashboard. You’ll be given a receive address that you will use to transfer your ADA from an exchange to your Yoroi wallet. With Cardano, your wallet will generate a new ADA receive address once the wallet receives a transfer on the current receive address. If you happen to send ADA to one of your previous ADA receive addresses, don’t sweat it, it’ll still be deposited to your wallet. The reason Cardano gives you a new receive address is for security and privacy purposes as anyone who knows that address can look up it’s activity on the Cardano blockchain. By using different receive addresses, the total holdings of the main wallet are unknown. Further explanation can be found here.
Copy the receive address and head over to your exchange. The Cardano website has a good article on withdrawing your ADA from an exchange. One of my favorite exchanges is Coinbase Pro.
Note that if you have a Coinbase, then you have a Coinbase Pro account. Coinbase and Coinbase Pro have separate holdings and you can transfer between the two for free. Coinbase Pro has lower fees than Coinbase and allows you to submit limit and stop trades.
For Coinbase Pro, click on your Portfolio and then click “Withdraw”. You’ll be given a popup similar to the following screenshot.
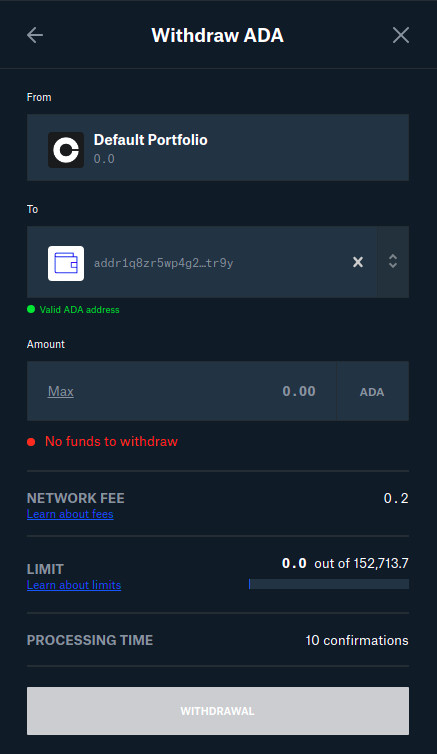
All of my ADA is pledged to my 4WARD pool so I won’t have any funds to withdraw. The important thing to note is that after pasting your Yoroi receive address, you should see the green “Valid ADA Address” message. The fees to transfer ADA are low so if you want to be sure about how you have everything setup, then you can send as little as 1 ADA. It can take a couple of minutes to go through, so be patient with it. If you click on the “Transaction” tab within Yoroi, you should eventually see the transfer. If it goes through, then you know you’ve done everything right. If it doesn’t show up after 30 minutes (way past the time it should have showed up), then you have a disconnect somewhere along the way. Always make sure of your receive address within Yoroi and then within your exchange. If everything is good, then you can transfer the rest to your Yoroi wallet.
Delegating/Staking
Now that your wallet is funded, you can delegate! (If you are new to staking overall, Cardano has a good FAQ for further information.) Click on the “Delegation List” tab within Yoroi. By default, the list is sorted by Score which is a calculation based on pledge, delegation, live stake, and other variables. You can search for pools using the Search box. As an example, search for “4WARD”, which is my Cardano Pool.
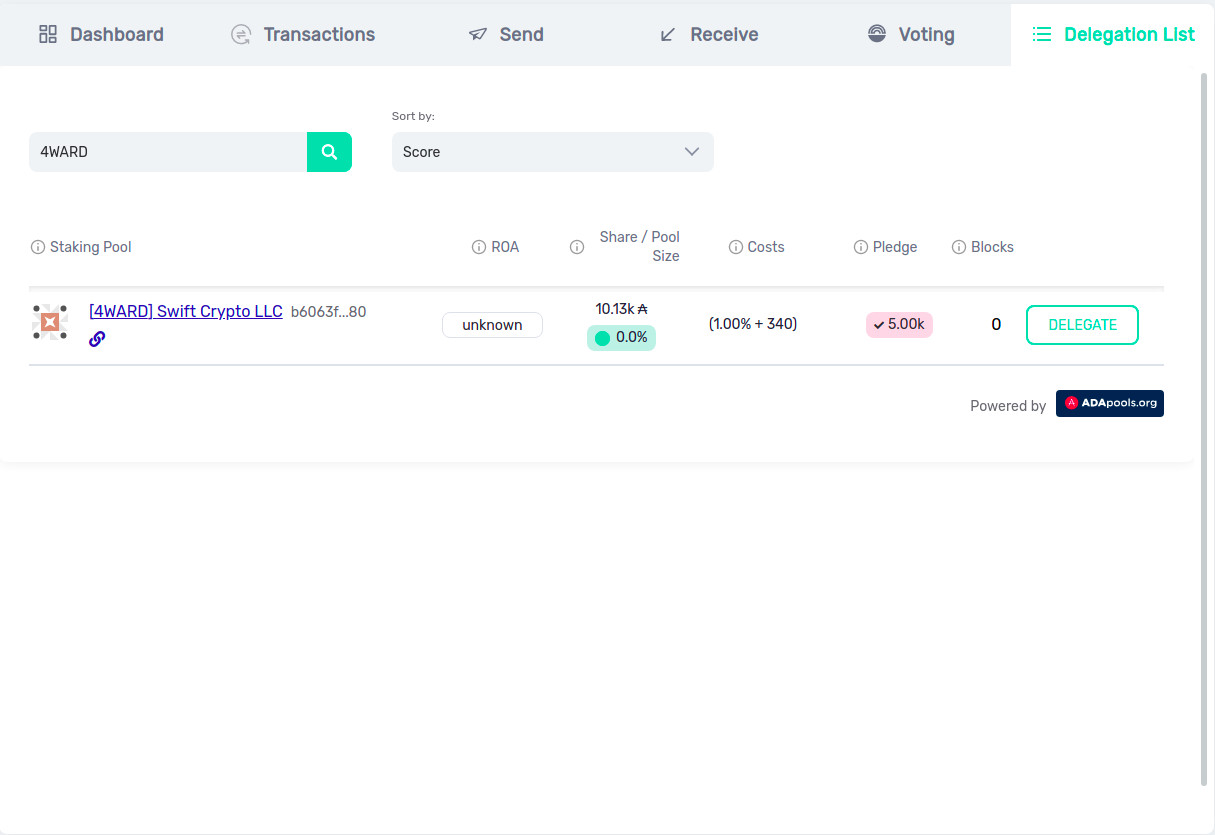
*Note that the “Swift Crypto LLC” pool has since been renamed “ADA for Warriors”. See here for more information
There are some factors you should take into account when selecting a Cardano Pool. If the Share/Pool Size is over 64 million ADA, you will miss out on some rewards. This is called the “k” parameter. Larger pools will generally give a steady reward but don’t help decentralize Cardano. For example, Binance owns over 40 Cardano pools. Concentrating that much ADA to one entity obviously has a negative effect on decentralization. Please consider delegating to a smaller pool when making your choice.
Other factors include the historical pool performance and fees. Historical pool performance doesn’t mean the pool will continue to have that performance, but it is a decent indicator of how well the pool is maintained. (Newer pools like mine, obviously won’t have any historical performance.) The basic/min fee of 340 ADA is the recommended minimum fee. From there, a pool can have a variable fee of 0% to 100%. If a pool has a 1% fee, that does not mean that you get 1% less rewards! The 1% fee is calculated by taking the total rewards in a single epoch (5 day period), subtracting the 340 min fee, and then multiplying that by 1%. The rest (99% in this example) is distributed to all of the delegators in proporation to the amount of ADA they delegated. If there are 10 delegates and they all have the same amount of ADA delegated, each delegate would get 10% of the rewards after subtracting the 340 ADA and the variable fee. So the affect of the small variable fee is minimal to your rewards overall.
These variable fees help Pool Operators pay for the costs of operating and maintaining a Cardano Pool. Some pools also donate to causes. If you are interested in learning more about that, see Mission Driven Pools. For my 4WARD pool, I’m working on setting up donations to a Veteran charity. Once I have that in place, I’ll be sending out an announcement!
Once you’ve selected a pool, hit the “DELEGATE” button. You will need to confirm the Stake Pool information and the amount of ADA to delegate. You will be shown the delegation and transaction fee. When you unstake, you will get the delegation fee back but not the small delegation transaction fee. Hit “DELEGATE” to stake!
Rewards
It’s imporant to note two things about rewards. The first is that if your selected pool is not active for an epoch, then you will not receive any rewards from that epoch. This can be frustrating and it’s the reason that some people don’t support smaller pools. Before each epoch, a weighted random selection of pools to be active for the next epoch occurs. The pledge and live stake are two important variables into that selection. Smaller pools have a lower chance of being selected, however they will offer greater rewards than larger pools since the rewards are split between less delegates. Over time, delegating to a small or large pool should even out to a similar return.
At the start of an epoch, snapshots are taken of all pools and that information is used to calculate the rewards. That means that if you deposit or withdraw after the start of an epoch, it has no affect on your rewards for that epoch. It can take up to 20 days for you to receive your first rewards (assuming your selected pool is active the entire time). The steps look like this:
- You delegate your ADA to a pool during Epoch A (1 to 5 days)
- Epoch B, your pool is active you earn rewards (5 days)
- Epoch C, rewards for Epoch B are calculated (5 days)
- Epoch D, Rewards for Epoch B are paid out (5 days)
This process repeats for every epoch that your pool is active. Because of the delayed reward distribution, if you completely unstake your delegation, you will forfeit rewards you may have earned. If you withdraw ADA from your wallet, but keep your staking active, you will still receive your rewards that you’ve already earned. With that, if you wanted to liquidate all of your ADA, you might want to leave 1 ADA in your account for 3 epochs to gather the rest of your earned rewards before unstaking.
That’s it! You are now earning passive income and supporting the Cardano network through staking!
If this guide has helped you, please consider helping me get my 4WARD pool off the ground by delegating with me. Thank you!